
Field Service Management for Jira and JSM · Docs
How to Schedule a Visit
IntroductionIn the Scheduling View of the Project Page, you can drag and drop unplanned visits, assign them to team members, and adjust the visit duration...
Introduction
In the Scheduling View of the Project Page, you can drag and drop unplanned visits, assign them to team members, and adjust the visit duration using the timeline.
Steps to Schedule a Visit
Navigate to Scheduling View
In the Project Page of Field Service Management (FSM) app, navigate to the Scheduling View.
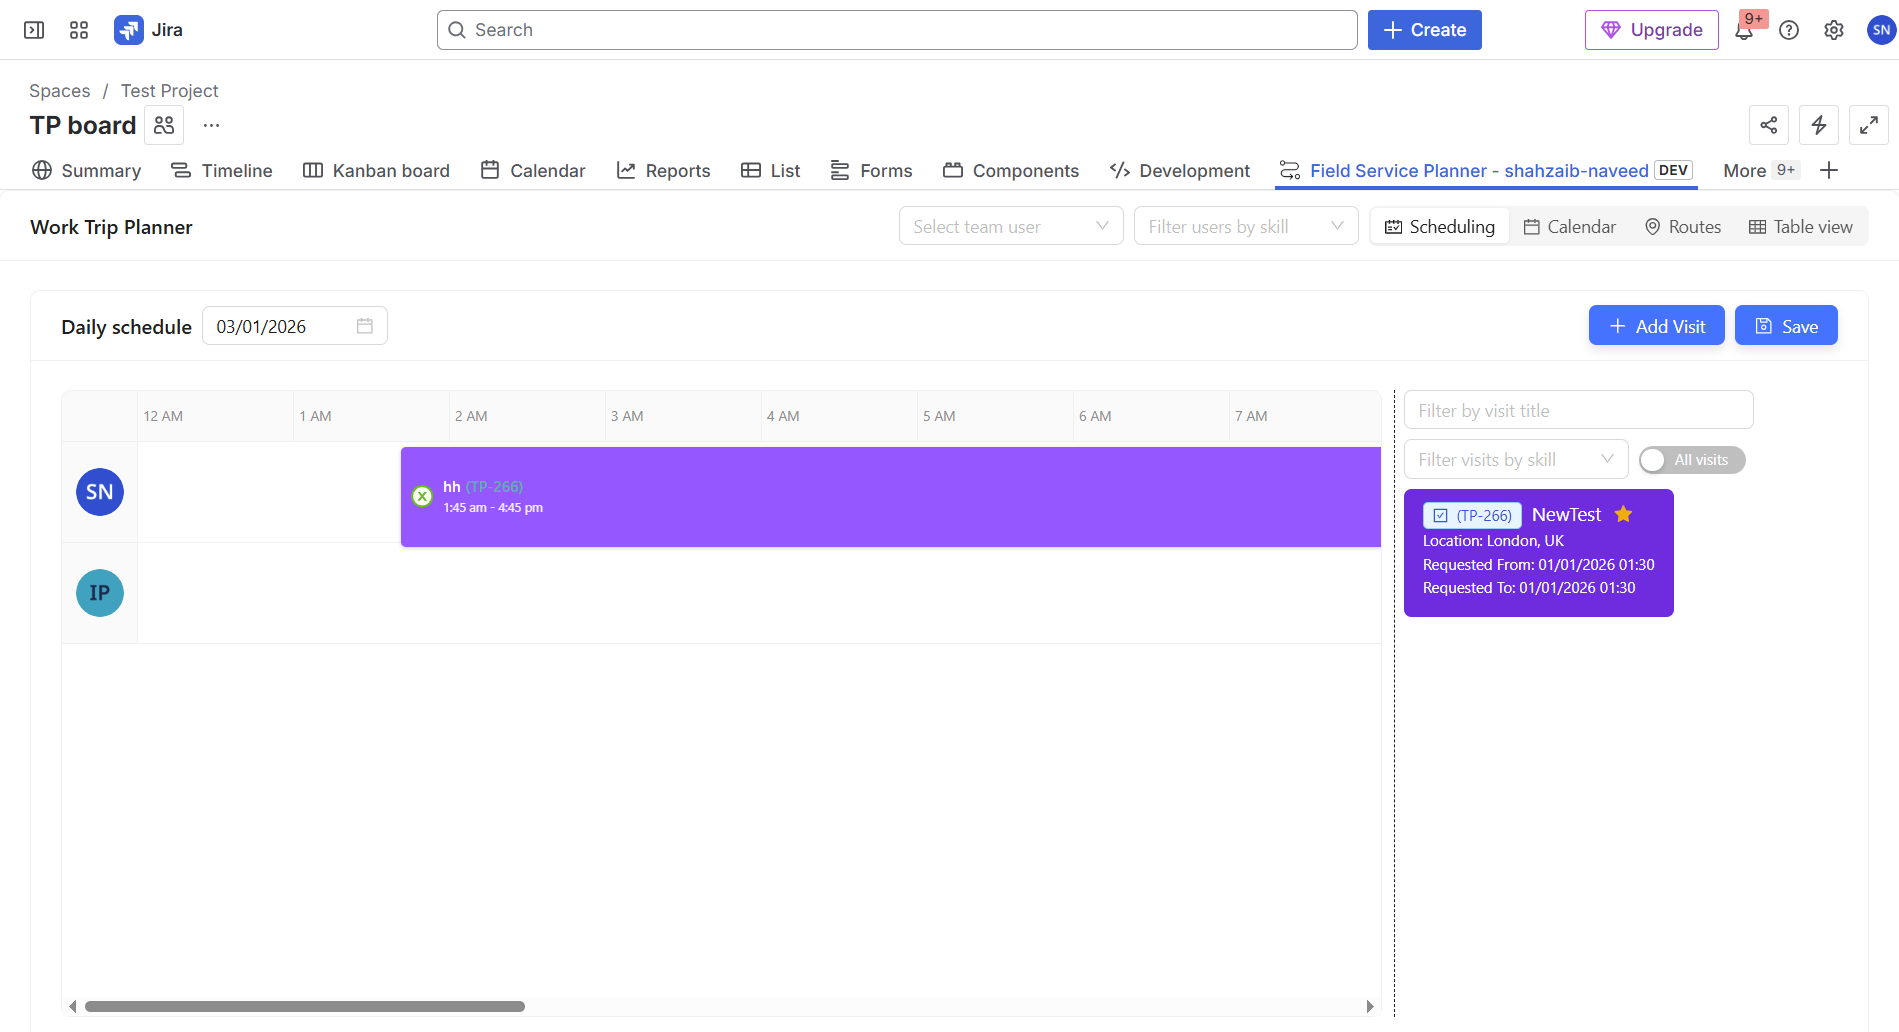
Here, you will see a list of unplanned visits and a timeline display.
Use the Date Picker
At the top of the schedule view, use the date picker to select the date you want to schedule the visit for.
Drag and Drop an Unplanned Visit
From the Unplanned Visits list, choose a visit card that needs scheduling.
Drag the card and place it on the timeline.
The timeline is horizontally aligned to represent time and vertically lists all team users. You can add the users from the Project Settings page of the app.
Assign the Visit to a Team User
Drag the visit card to the desired user on the timeline.
The visit will automatically be assigned to that user.
Resize the Visit Duration
Initially, all visits are set for 2 hours.
You can resize the visit by dragging the edges of the visit card to match the desired time duration.
Adjust the Time of the Visit
As you drag the visit card horizontally, the visit’s time will update based on its position on the timeline.
Color-Coding by Visit Type
Each visit type displays with a distinct color that was assigned to it during configuration in the Admin Panel.
Save the Scheduled Visit
Once the visit is properly scheduled, click the Save button to save your changes.
The visit will now be assigned to the selected user and will be visible in the Scheduling View Timeline and Calendar View.
The scheduled visit's date-time, and assignee will be reflected in the Table View of the project page as well.
Expected Outcome
The unplanned visit is scheduled on the timeline and assigned to the correct user.
The visit appears in the Scheduling View, Timeline View, and Calendar View.
The table view is updated with the correct visit details (date, time, and assignee).
Tips
Ensure that the team users are added in the Project Settings page before attempting to assign visits to them.
Use the date picker effectively to filter visits for specific dates.
Keep track of the time by resizing and adjusting the visit cards to match the visit's actual duration.
b) How to Delete a Scheduled Visit
Introduction
This section explains how to remove a scheduled visit from the timeline and return it to the Unplanned Visits list in the Schedule View.
Locate the Visit Card: Click on the cross (X) at the top left corner of the scheduled visit card you wish to remove from the timeline.
Confirmation Prompt: A confirmation modal will pop up asking, “Do you want to delete it?”
Confirm Removal:
Click OK to confirm. The visit will be removed from the timeline and returned to the Unplanned Visits list.
Click Cancel to cancel the removal. The card will remain on the timeline.
Save Changes: Click the Save button to confirm the updates. The visits you removed from the timeline will now appear in the Unplanned Visits list.
Expected Outcome
The scheduled visit is removed from the timeline and placed back in the Unplanned Visits list.
The timeline, table view, and calendar view are updated to reflect the changes.